
Friday 29 April 2011
Thursday 28 April 2011
Light Corridor Realisation IV
I've obtained some lights as i have previously stated! here they are before construction:


lights fitted, connected to motion sensors.

Lights wired up! partial lights on!

Side View!

the side of the inside!

All lights working! apart from a faulty tube at the left of the end of the corridor!

Now to set up in the studios so that i can tinker with the sensors settings!
I will have to wait until the floor has been polished so that there will be a brilliant reflection across the floor from the lights!
1st Mock up complete
Today I finished the construction of my 'Light Corridor'. I had sourced all of the required materials and i wanted to set it up (make it) before i transport it to uni, this is so that i can find out if there are any faulty parts (which i found) that can get rectified.
In all honesty, I thought it looked bloody marvelous. it is fantastic to finally realise a work from the drawing board to completion.
Things i still need to do to the piece are to fine tune the motion sensors so that they are all running well and in synchronization. I also need to tidy up the wiring ( I left them untied to the frame during mock up so it would be easy to solve any problems.) I havn't spent ages fiddling with the motion sensors because if i get them working tip top in the workshop they would work differently in another environment.
Initial thoughts about the piece are that of excitement, and anticipation for setting it up in the studios. I also have been thinking a lot about the way the piece itselfn functions.
Initially the idea was to have a person initiating the lights at the opposite end to a given motion sensor. during testing this seemed impractical as the lights flicker before they turn on and a person would have reached the end of the corridor before the lights achieve the desired function. Instead of this i have set the motion sensors up to trace movement. activating the motion sensors immediate lights. This is more similar to my ghost lights in that it is showing the movement of somebody as it happens (although not in different spaces). This piece remains reminiscent of a ghost because an eery flickering of lights follows a person down the corridor behind them.
During mock up today, the motion sensors were not tuned. the lights flickered seemingly of there own accord. I found it incredibly interesting seeing the lights flicker and turn on and off 'randomly' inciting an otherworldy feeling inside me.
I shall shortly be posting some images and videos of the days achievements.
Wednesday 13 April 2011
Ghost Lights
Just a little video I have found of my advancement of the ghost light piece. the video is a little poor because the lights are so bright. Below is a photo of them (I have removed diffusers since taking this video which is why the photo looks different)

Tuesday 12 April 2011
Good News
So my quest for lights is finally over! I've just gotten off of the phone with a company thats willing to give me some discounted lights. This is very good news as I've been sending letters and ringing everyone and anything to try to get hold of some lights for about a month now.
This means that whilst the studios are full of stuff, I can get a mock set up of my corridor completed and tested 'off site' this means I will be able to bring the sculpture to uni and build it like a flat pack piece of furniture. saving me precious time in case anything goes wrong.
Whilst these are being delivered I have some time to refocus my energies on other projects.
Keep watching this space!
Sunday 10 April 2011
Light Corridor Realisation III
1st Frame made!!!! so happy.

The welding of the floor fixings has caused them to warp slightly because of the heat.

This screw top was devised to fasten the cross bar across the top. This wasn't welded as I want the frames to be completely portable.


The corridor is slowly growing!!!

Completion of the welding and the corridor is up!! (I mock fitted the corridor to see what it looked like)
The next stage of the process is sourcing the lights and getting them fitted onto the frames! I am searching for some sort of sponsorship to keep the costs down on this project.

The floor was deceptively uneven so the frames look a bit wonky during mock up.
Initial thoughts about this are that i hope the floor in the space is even otherwise i could face some difficulties during final set up!

Light Corridor Realisation II
Initial Layouts with cutouts before 'tacking'.


Magnets hold the cutouts in place for welding.

Tacking the two pieces together before welding the whole length.

Too much strength on the MIG welder melted the joint when i attempted to weld after tacking for the first time. This was resolved by turning the welder down.

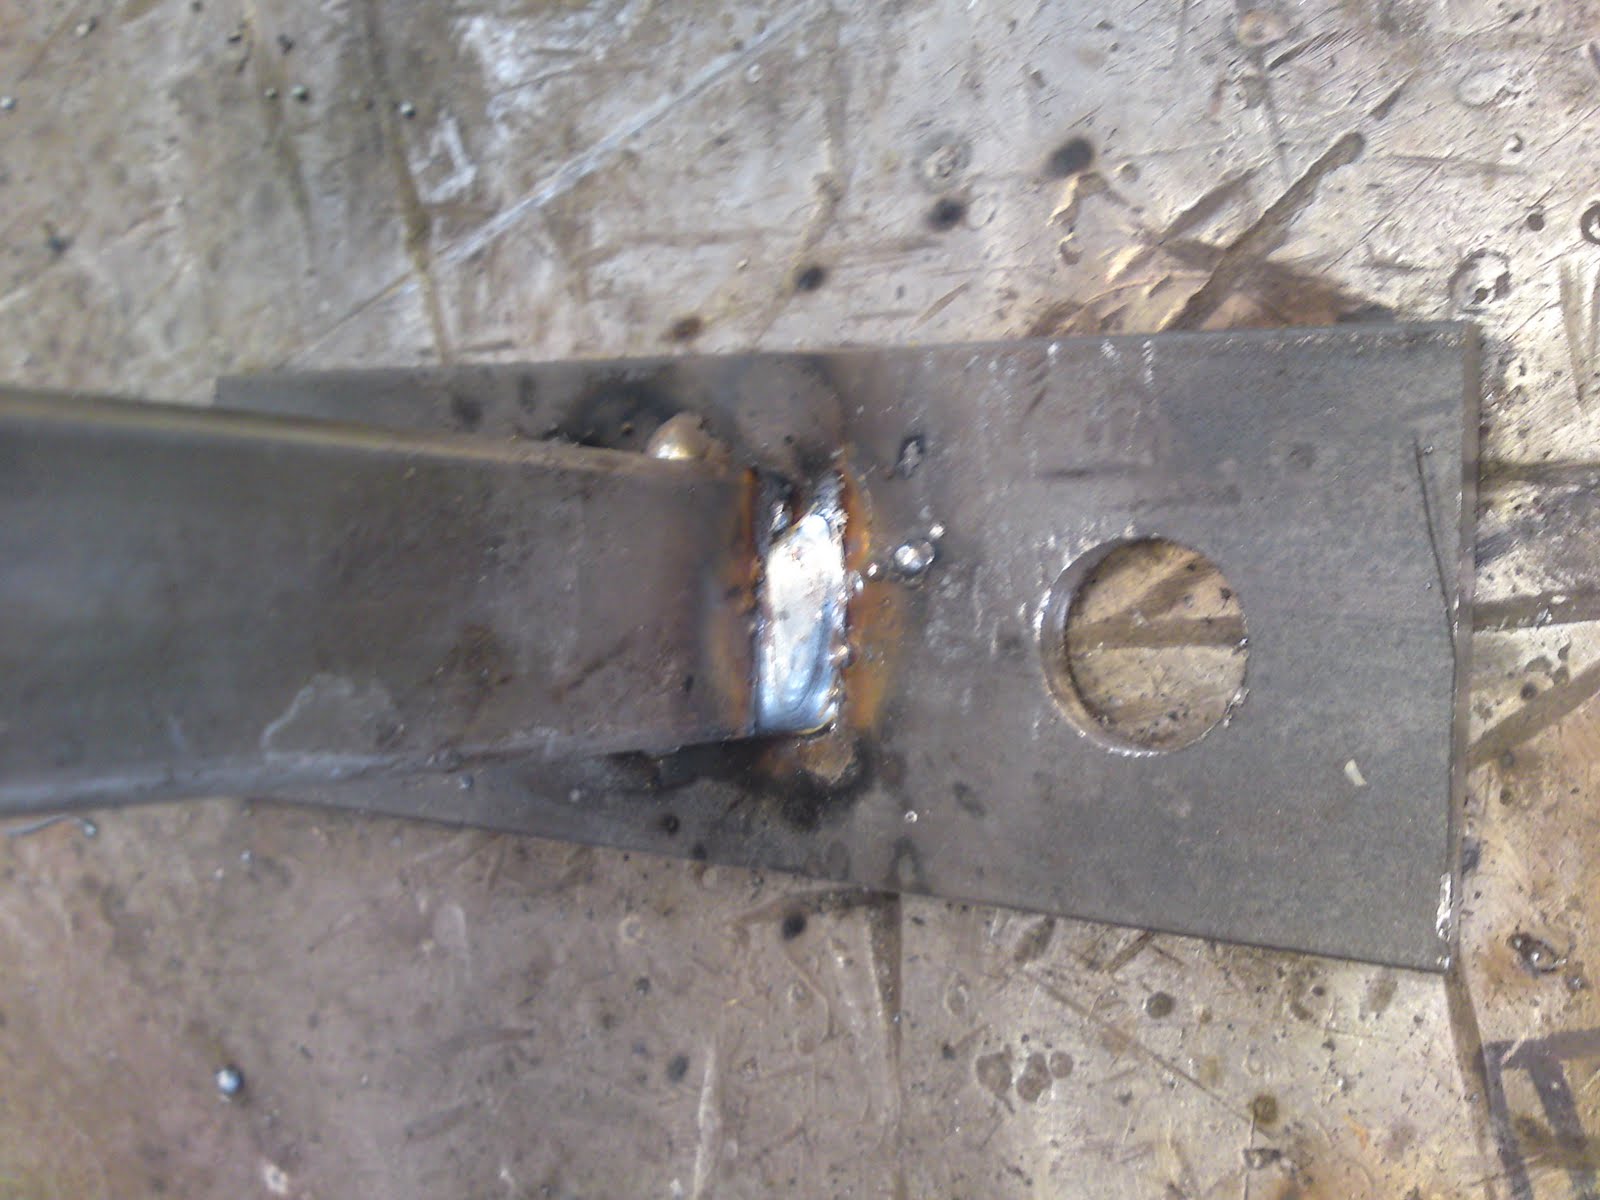
First successful weld, a bit sloppy but practice makes perfect!

beginning to see how my frames will come together after welding one side. The corner weld was 'plugged' after I butchered it, this is essentially filling the gap i left with more weld to repair the damage and make it strong.

Practicing welding the stands onto the framework. This was harder as the thicknesses of the metal were different and there was a danger of melting through the thinner piece (like i had done before). The Welder had to be turned up to weld the thicker piece and as i have previously mentioned in a previous post, this can be counteracted by focusing more of the weld on the thicker piece of metal.
I chose to leave two sides with just a 'tack' as this is a practice piece and will serve as a reminder and evidence of the processes involved.


Light Corridor Realisation
I have began fabricating my framework for this piece. I sought out specialist help in the construction with regards to welding as the welding needed to be done properly on every component because of safety reasons when it comes to the degree show. I had supervision and training in the use of MIG welding machinery from a qualified welder. My welding was checked as i went along to ensure the welds were done properly even after i had several practice runs on off-cut materials before i felt confident on advancing onto the main framework.
When done correctly i was told that 1" of weld is enough to support roughly a ton. I had to ensure that the weld had penetrated both pieces of metal otherwise even though it might appear to be a 'proper' weld as such, the strength and integrity of the piece could be compromised severely in that the weld will break if stressed.
I found problems when welding different thickness' of metal together as it became very easy to burn through the thinner parts. practice has rectified this issue. The welder who was supervising me explained that all that i needed to do was to focus more of the welding on the thicker piece of metal. I also found out that with a MIG welder you are supposed to weld away from you, as against 'stick' welding in which you weld towards you (if that makes sense) i shall upload images of my early attempts at weldings so i can show my progression.
Light Corridor
I am currently working on producing a corridor of light. It will be fully interactive and I intend to include this piece in the degree show in June.
The idea was born from an intention to place interactive lighting in a corridor which enters the show space. There were H&S issues with this which is a shame as I liked the idea of exploring the notion of the significance of 'steps up to the museum'. This idea is reflected in some CAD drawings that i have produced in relation to this.


The idea was born from an intention to place interactive lighting in a corridor which enters the show space. There were H&S issues with this which is a shame as I liked the idea of exploring the notion of the significance of 'steps up to the museum'. This idea is reflected in some CAD drawings that i have produced in relation to this.
Initial Plan for lights to be situated along corridor


proposed construction of a corridor in studio space

I was concerned with the possibility that this proposal could appear too minimalist, too Bruce Nauman, I changed this idea so that i could instead create a corridor that could be placed anywhere allowing for light to be projected around the object in the space. I had various influences such as the work of Steve Bishop, a Mars commercial, Cerith Wyn Evans. Below are some more CAD drawings detailing my proposed piece of work.


Tuesday 5 April 2011
A bit on the side
To keep my work varied I have been producing random 'fun' sculptures every now and again to avoid the monotony of slaving away at one project for too long.
Cup Telephone,
2011,
Rotary Telephone - Plastic Cups.


Inside Out Cup,
2011
Plastic Cup turned inside Out.

Subscribe to:
Posts (Atom)